
Updated on: 2026-05-18
This guide explains how Maysara will be embroidered with care and intention, so the final look remains clean, balanced, and durable.
You will learn how to plan design placement, prepare the fabric surface, and choose stitching density for a polished Tatreez result.
Practical workflow steps are included, along with common mistakes to avoid during embroidery on modest wear.
You will also find helpful questions about needles, thread tension, and finishing methods that support long-term wear.
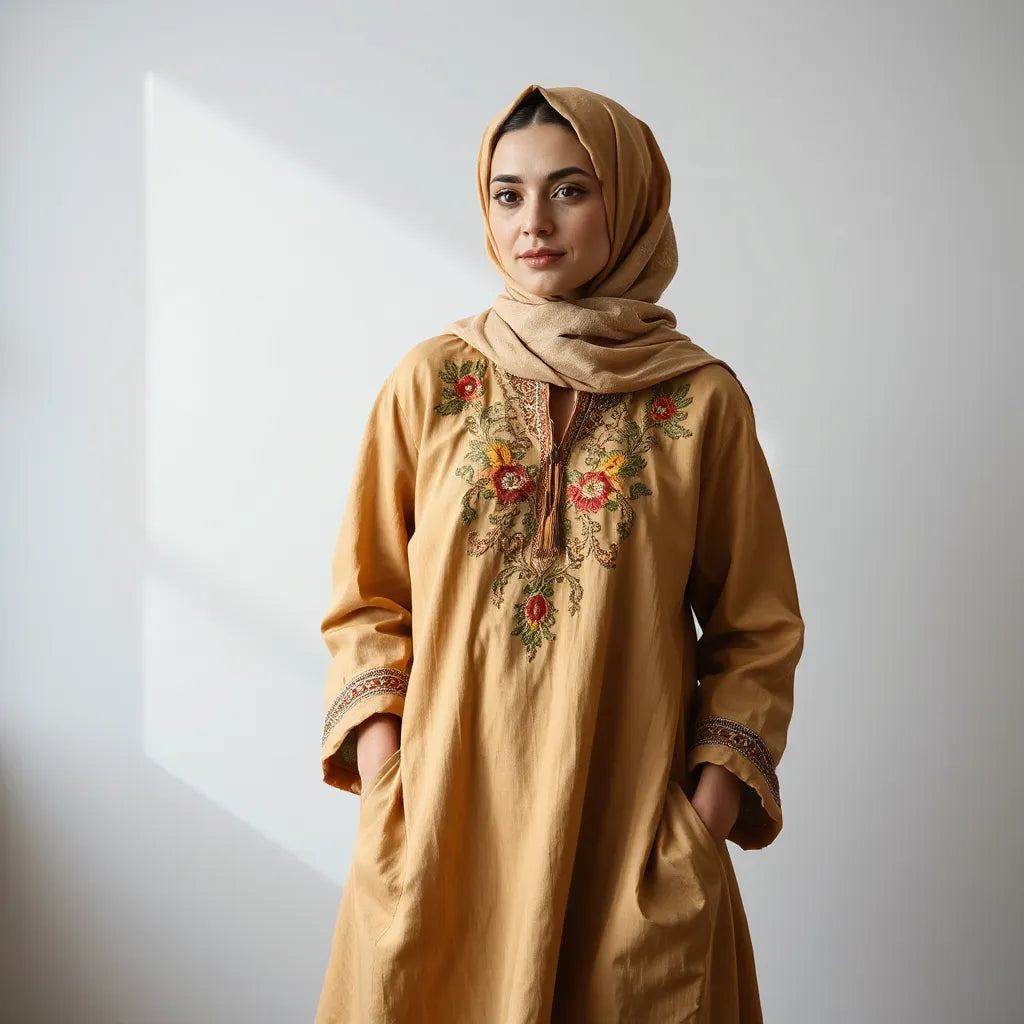
Maysara will be embroidered: a structured approach to beautiful Tatreez
When Maysara will be embroidered, the quality of the result depends on more than artistic skill. It depends on disciplined preparation, careful placement, and consistent stitching technique. For anyone who values artisan-made modest fashion, a structured embroidery workflow helps preserve cultural details while achieving a refined finish.
This article offers an authoritative guide you can apply whether you are commissioning hand-embroidery, training new stitchers, or evaluating craftsmanship for a finished garment. You will also find guidance on surface preparation, thread handling, and finishing choices that support long-term stability.
Essential Tips
- Confirm the intended motif placement before stitching, including symmetry and visual balance.
- Test stitch behavior on a fabric swatch to verify thread pull and coverage density.
- Use a clean transfer method and remove any residue gently to protect surface clarity.
- Maintain consistent tension so lines look even without puckering.
- Plan thread length and winding habits to reduce tangles and avoid color variation.
- Choose stitch types that match the motif function, such as outlining, filling, and texture accents.
- Keep finishing steps in mind from the beginning, including edge handling and backing support.
Detailed Step-by-Step Process
The steps below describe a reliable workflow for embroidery on structured textiles. They are designed to support clean edges, stable filling, and a consistent hand-finished look.
Step 1: Design and placement planning
Begin with a clear decision on where the motif will sit. Use reference lines for alignment, then evaluate how the design will read when the garment is worn. For Maysara will be embroidered projects, the surrounding negative space is part of the composition, so confirm the spacing around borders and seams.
Step 2: Fabric surface preparation
Embroidery behaves differently on each textile weight and weave. Ensure the surface is clean and well stretched to reduce distortion. If the fabric is prone to shifting, temporary stabilization can support straight stitch paths. This step helps the embroidery stay crisp over time.
Step 3: Thread and needle selection
Match needle size to thread thickness and fabric density. Too large a needle can create unnecessary holes and weaken structure. Too small a needle can bend under strain, leading to uneven stitch shape. For thread color, select shades that align with the garment palette and the intended depth of the motif.
Step 4: Transfer and mapping
Transfer the motif using a method that leaves minimal residue and does not bruise the fabric fibers. Once mapped, trace key contours lightly. Focus on outlines first, then progress to fill areas. This ordering keeps the motif shape stable before adding texture.
Motif alignment grid, pinned fabric edges, outline-to-fill progression
Step 5: Outline stitching for shape control
Outlines anchor the design. Stitch along contours with controlled tension and consistent spacing. If outlines are uneven, the filling will follow the mistake. For Maysara will be embroidered work, crisp outlines also improve visual symmetry from every viewing angle.
Step 6: Fill stitching and density control
After outlines are established, fill the motif using the chosen Tatreez technique. Maintain uniform stitch height and manage coverage so the fill appears balanced rather than patchy. Density matters: dense filling can feel heavier, while lighter filling may expose the surface weave.
Step 7: Shading and accent details
Accents create depth and movement. Add them after the main fill stabilizes so the design retains structure. Use small, deliberate stitches for fine details. This stage is where craftsmanship becomes visible, especially around border curves and small pattern elements.
Step 8: Backing support and neat reverse finishing
The reverse side is part of quality. Use backing support if needed so stitches sit comfortably and do not pull the surface. Trim threads neatly and avoid bulky knots. Neat reverse handling reduces friction when the garment is worn against skin or layering pieces.
Step 9: Finishing and removal of transfer marks
Once stitching is complete, remove any transfer marks gently. Check the motif edges for loose threads, then tidy the perimeter. If the garment contains seams near the embroidery zone, ensure the stitch paths do not interfere with construction lines.
Clean finishing tools, measured tension checks, trimmed thread ends
Step 10: Quality check and consistency review
Perform a full inspection. Evaluate line steadiness, fill uniformity, and overall symmetry. View the garment in natural light to confirm color balance and motif clarity. This review stage is essential for establishing that Maysara will be embroidered with a professional standard.
Common Mistakes and Fixes
Even skilled stitchers can encounter issues. The key is recognizing the cause early and correcting it without damaging the fabric surface.
Mistake: puckering from excessive tension
When tension is too high, the fabric surface gathers and the motif appears distorted. Fix by loosening stitch control and, if possible, re-stitch only the affected segments. In commissioning work, request a tension test to reduce this risk.
Mistake: uneven outline stitch height
Uneven outline stitches create a shaky edge and reduce motif sharpness. The fix is to recalibrate needle angle and stitch spacing. Practicing on a small swatch can reveal how the chosen needle moves through the weave.
Mistake: inconsistent fill density
If fill density varies, the motif can look flat in one area and overly heavy in another. The remedy is to standardize stitch counts and maintain the same coverage rhythm across the entire fill.
Mistake: transfer residue remaining after cleaning
Some transfer methods leave faint marks if handled too aggressively. Use careful removal, then do a final gentle check. If residue appears, pause and adjust the transfer approach for subsequent work.
Mistake: bulky knots and thread tangles
Bulky knots can create uncomfortable lumps on the garment interior. Reduce knot size by securing threads thoughtfully and trimming consistently. Also manage thread length to prevent tangles that disrupt uniform color and stitch rhythm.
Care After Embroidery
Proper care supports embroidery longevity. While hand-embroidery is resilient, it benefits from gentle handling that protects both stitches and the surrounding textile.
- Wash with care: choose gentle cycles when machine washing, or opt for careful hand washing with mild detergent.
- Dry thoughtfully: avoid high heat that can warp the fabric and alter stitch tension.
- Store flat when possible: reduce pressure on raised areas so the motif retains its shape.
- Press indirectly: use a protective cloth and press at appropriate heat levels to avoid direct stitch contact.
- Inspect regularly: check for loose threads early and repair promptly to prevent unraveling.
These steps preserve artisan detail and help the embroidered motif maintain a clean, even appearance for repeated wear and seasonal rotation.
Style and Wear Ideas
Embroidery placement influences how the garment drapes and how patterns interact with movement. For Maysara will be embroidered motifs, designers typically prioritize visibility in natural body lines and create harmony with garment borders.
Consider these approach notes:
- Pair embroidered panels with solid, supportive layers to keep attention on the motif.
- Use complementary necklines and sleeve finishes so the embroidery does not compete with construction details.
- Balance contrast carefully: subtle contrast can feel refined, while higher contrast can create a stronger statement.
- Coordinate accessories with thread tones, particularly for undertones such as warm or cool color families.
If you are exploring matching modest wear options, consider pairing embroidery-ready garments with high-quality inner pieces designed for comfortable layering. You can review supportive base layers such as a cotton inner hijab or a cotton undercap to maintain a smooth surface for styling.
For customers who want an artisan-made look across the outfit, you may also explore embroidery-focused fashion pieces and coordinating apparel on the boutique site, including an embroidered thobe option.
Summary and Takeaway
Maysara will be embroidered outcomes improve dramatically when preparation and process discipline are treated as essential craft steps. By planning placement, preparing the fabric surface, selecting appropriate tools, and following a consistent outline-to-fill workflow, embroidery maintains clarity and structural stability.
Quality checks, careful finishing, and thoughtful aftercare protect the motif so it remains crisp through wear cycles. If you commission or evaluate artisan work, request a swatch test and confirm finishing standards for both the front and reverse.
Q&A Section
How do I choose the right stitch density for an embroidered motif?
Choose stitch density based on the textile weight and the intended visual effect. For lighter fabrics, moderate density helps avoid puckering and excess bulk. For structured garments, fuller density can create richer texture. A brief swatch test is the most reliable way to validate coverage and stitch behavior before full execution.
What does consistent tension change in the final embroidery?
Consistent tension affects the stability of outlines, the smoothness of fills, and the overall symmetry of the motif. When tension varies, the fabric can gather or stretch, which distorts lines. Maintaining tension control supports clean edges, consistent stitch height, and a professional finish.
How should embroidered garments be stored to preserve the design?
Store embroidered garments flat or with careful padding to prevent pressure on raised stitches. Avoid long-term direct contact with moisture or harsh heat sources. Regular inspection helps you catch loose threads early, which prevents minor issues from becoming permanent damage.
What finishing method is best for durable, comfortable wear?
Durable comfort comes from neat thread management, minimal bulky knots, and appropriate backing support when needed. Finishing should also consider seams nearby so embroidery does not interfere with garment construction. A final inspection under natural light helps confirm cleanliness and consistency.
About the Author
Sulieman Alhazma
Sulieman Alhazma is an embroidery and modest fashion craftsmanship specialist with expertise in Tatreez-inspired design execution, stitch consistency, and garment-friendly finishing standards. Their focus is on preserving cultural pattern clarity while applying modern quality control methods. Sulieman Alhazma values careful process documentation so artisans and customers share the same understanding of a finished look. Thank you for reading, and may your next embroidery project reflect both precision and heritage.
Disclaimer: This article provides general guidance on embroidery best practices and garment care. Results can vary based on textile type, thread selection, and skill level. For decisions that affect product quality or personal requirements, consult a qualified artisan or professional service provider.
The content in this blog post is intended for general information purposes only. It should not be considered as professional, medical, or legal advice. For specific guidance related to your situation, please consult a qualified professional. The store does not assume responsibility for any decisions made based on this information.